

Table of Contents
- Step 1: Pick Your Beans and Grind for Cold Brew Extraction
- Step 2: Measure Your Cold Brew Coffee Ratio
- Step 3: Mix Coffee Grounds and Cold Water
- Step 4: How Long to Steep Cold Brew (and Why Temperature Matters)
- Step 5: Filter and Store Your Cold Brew
- Troubleshooting Cold Brew Extraction by Taste
- Frequently Asked Questions
Last Updated: October 16, 2026
Step 1: Pick Your Beans and Grind for Cold Brew Extraction
Cold brew extraction is the process of steeping coarse coffee grounds in cold water for an extended period to produce a smooth, low-acid concentrate. Get the grind and the bean wrong, and no amount of patience later in the process will save the batch. This guide from EmperRoar Coffee walks through five steps we use as our own benchmark, and the first one decides most of what follows.
Coarse Grind: The Non-Negotiable Starting Point
The best grind size for cold brew is coarse, roughly the texture of raw sugar or coarse sea salt. Fine grounds slip through most filters, clog the bed, and leave grit in the cup.
If you buy whole bean, grind in short pulses and check the texture between them. A common mistake is grinding too fine "just in case" the brew turns out weak. It won't help.
Bean Selection: Why Origin and Roast Matter for Cold Brew
Origin and roast level change how a cold brew tastes more than most people expect. Medium and dark roasts hold up well over long steeps because their deeper flavors stay balanced.
For a smooth, balanced base, a medium roast single origin is a safe starting point.
This is where bean quality shows. Our Ethiopia Natural leans vibrant and fruity, while the Tanzania drinks smooth and balanced, which makes it an easy first bag if you're new to cold brew.

Step 2: Measure Your Cold Brew Coffee Ratio
The cold brew coffee ratio determines strength before anything else does. A 1:8 ratio by weight, one part coffee to eight parts water, gives you a concentrate. A 1:15 ratio gives you a ready-to-drink brew you can pour straight over ice.
Weigh your coffee if you can. Volume scoops vary wildly between beans and grind settings, and cold brew is unforgiving about inconsistency. A basic kitchen scale removes the guesswork in seconds.
Concentrate vs. Ready-to-Drink Ratios
| Style | Coffee-to-Water Ratio | Yield | Best For |
|---|---|---|---|
| Concentrate | 1:5 to 1:8 | Strong, needs dilution | Iced lattes, milk drinks |
| Standard | 1:10 to 1:12 | Medium strength | Daily drinking, some dilution |
| Ready-to-drink | 1:15 to 1:17 | Drink as-is | Straight over ice |
Start with concentrate if you're unsure. You can always add water or milk later, but you can't take strength out of a weak batch. For a 1-litre batch at 1:8, that's 125 grams of coarse grounds to 1 litre of cold water.
Step 3: Mix Coffee Grounds and Cold Water
Add the grounds to your brewing vessel first, then pour cold water over them and stir gently until every ground is saturated. Skipping the stir is the most common reason a batch tastes flat on top and bitter at the bottom.
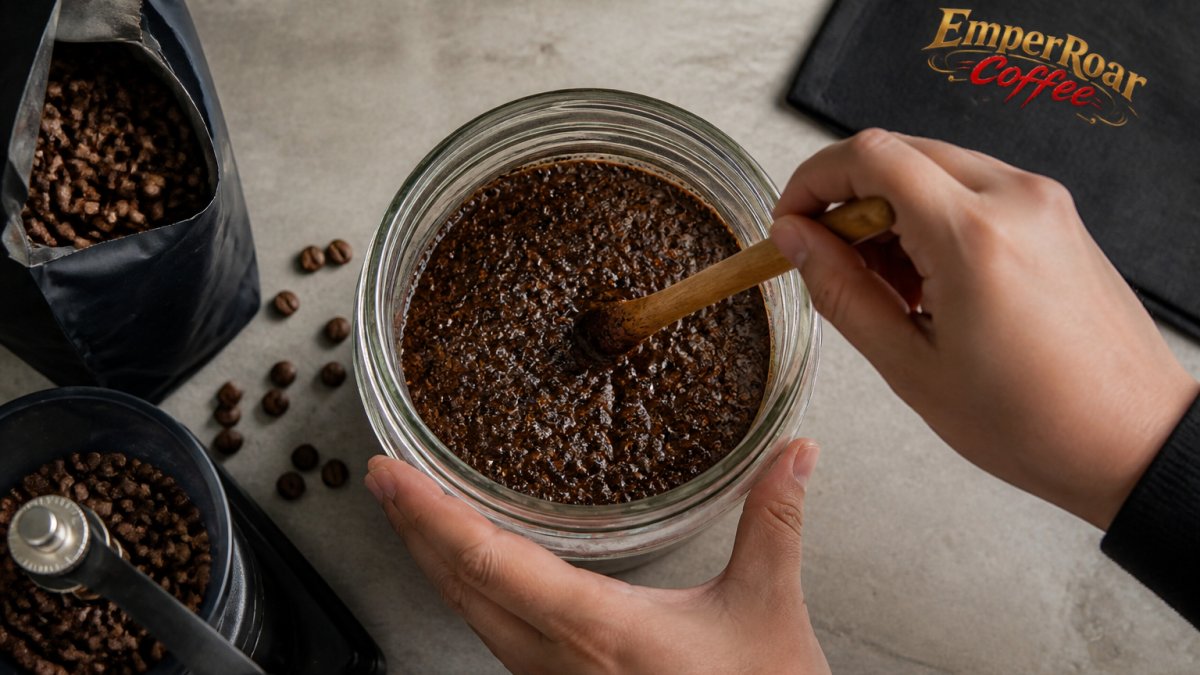
Use room-temperature water or straight from the refrigerator, never warm. A glass jar with a lid works perfectly and lets you watch the color develop. Give it 20 to 30 seconds of slow stirring, then seal it.
Step 4: How Long to Steep Cold Brew (and Why Temperature Matters)
How long to steep cold brew depends on two variables working together: temperature and time. At room temperature, 12 to 16 hours is usually enough. In the refrigerator, plan on 16 to 24 hours.
Set a timer and taste before you commit. Pull a small sample at the 12-hour mark, then again two hours later. The batch is ready when the flavor feels rounded rather than sharp.
Room Temperature vs. Refrigerator Steeping: A Controlled Comparison
Steep two identical batches side by side, same beans, same coarse grind, same 1:8 ratio, same vessel, and the difference is obvious within a single day.
| Variable | Room Temperature (about 20-22°C / 68-72°F) | Refrigerator (about 4°C / 39°F) |
|---|---|---|
| Typical steep window | 12-16 hours | 16-24 hours |
| Speed to first drinkable cup | Faster, sometimes 12 hours | Slower, rarely under 16 hours |
| Forgiving window | Narrow, bitterness can arrive within 2 hours of peak | Wide, a few extra hours rarely ruins the batch |
| Flavor profile | Brighter, more volatile aromatics, slightly sharper finish | Smoother, rounder, more consistent cup to cup |
| Best for | Same-day brewing when you can watch the clock | Overnight brewing and repeatable results |
Room temperature gets you there faster, but the window between "ready" and "over-extracted" is narrow. Miss it and you get bitterness that no amount of milk will hide. The refrigerator is slower and far more forgiving.
How Steep Time Interacts With Grind and Ratio
Steep time does not work in isolation. If you extend the steep, you are effectively increasing extraction, so the other variables should compensate:
- Longer steep + finer grind compounds extraction and pushes the batch toward bitterness. Keep the grind coarse if you plan to steep past 18 hours.
- Longer steep + tighter ratio (more coffee) can push past the point where sweetness reads through. If you steep 24 hours, a 1:10 to 1:12 ratio is often safer than a 1:8 concentrate.
- Shorter steep + coarser grind risks under-extraction and a thin, sour cup. If you only have 12 hours, grind slightly finer than you would for a 20-hour batch, still coarse, but toward the finer end of coarse.
A practical rule: pick your steep time first, then set grind and ratio to match it, rather than adjusting all three at once. Change one variable per batch and keep notes, because cold brew rewards repeatability more than any other method.
Step 5: Filter and Store Your Cold Brew
Filter the concentrate by pouring it through your chosen method into a clean container, then seal and refrigerate. Straining twice, once through a mesh sieve and once through a finer filter, removes nearly all sediment and is the single biggest upgrade most home brewers can make to their cold brew.
Filter Method Trade-Offs: Paper, Mesh, and Cloth
Each cold brew coffee filter method changes both the clarity of the cup and how much work cleanup takes. The right choice depends on your batch size, how much sediment you tolerate, and how often you brew.
| Method | Clarity | Speed | Sediment | Cleanup | Best Batch Size |
|---|---|---|---|---|---|
| Paper (cone or basket) | Highest | Slowest; can clog with fines | Almost none | Throw away; replace each brew | 500 ml-1 L |
| Mesh strainer | Moderate | Fast | Some fines pass through | Rinse; reusable | Any size |
| Cloth / nut milk bag | High | Moderate | Very little | Rinse and air-dry; replace every few months | 1-4 L |
| French press | Moderate | Fast | Some sediment | Disassemble and rinse | 350-600 ml |
| Fine metal filter (reusable) | Moderate-high | Moderate | Little | Rinse; reusable | 500 ml-2 L |
A two-stage approach works best in practice: mesh first to remove the bulk of the grounds, then paper or cloth for polish. It takes an extra minute and produces a noticeably cleaner concentrate.
Food Safety and Storage: Keeping Your Batch Fresh
Store cold brew in a sealed container in the refrigerator and drink it within about a week. Because it is never heated, it does not get the shelf stability of a hot-brewed pot, so treat it like any fresh refrigerated drink. Keep it covered to stop it absorbing fridge odors, and label the container with the date you brewed it.
A few practical rules that make a real difference:
- Cool it fast. If you brewed at room temperature, refrigerate the filtered concentrate immediately rather than letting it sit out.
- Keep it sealed. Oxygen and fridge odors both degrade flavor; a tight lid matters more than the container material.
- Separate concentrate from ready-to-drink. Concentrate keeps longer than a diluted batch because there is less water activity. Dilute only what you plan to drink.
- Watch for signs of spoilage. A sharp, sour smell, visible cloudiness, or a film on the surface means the batch is past its window. When in doubt, pour it out.
- Freeze for longer storage. Cold brew concentrate freezes well in ice cube trays or sealed bags; thaw in the refrigerator and use within a few days.
Troubleshooting Cold Brew Extraction by Taste
Taste is the fastest diagnostic tool you have, and it tells you exactly which variable to adjust next time.
Bitter or harsh flavors usually mean over-extraction: too long a steep, too warm a spot, or grounds that were ground too fine.
Muddy or gritty texture comes down to filtration, not brewing. Add a second straining stage and the problem disappears.
If you'd rather start from a bean built for smooth, balanced results, our Kenya and Kopi Safari both hold up well to a long, cold steep.


Frequently Asked Questions
What's the best way to make cold brew coffee at home?
Use a coarse grind, a 1:4 coffee-to-water ratio for concentrate, and steep for 12 to 18 hours in the refrigerator. Mix grounds and cold water in a jar, stir to saturate, then cover and wait. After steeping, filter through a paper or mesh filter, then dilute 1:1 with water or milk before serving. This immersion method consistently produces smooth, low-acid cold brew with minimal bitterness.
How long should cold brew coffee steep?
Most cold brew recipes steep for 12 to 24 hours. For a balanced, smooth concentrate, 14 to 16 hours in the refrigerator hits the sweet spot. Steeping at room temperature speeds extraction, so reduce time to 8 to 12 hours. If your cold brew tastes weak, extend steeping by 2 hours. If it turns bitter, shorten the next batch. Keeping notes on steep time and taste helps you dial in your preferred strength.
What cold brew coffee ratio works best?
For a concentrated cold brew that you dilute before drinking, use a 1:4 ratio by weight (1 part coffee to 4 parts water). For ready-to-drink cold brew, use 1:8. Weighing with a kitchen scale gives repeatable results. If you prefer measuring by volume, start with 1 cup coarse grounds to 4 cups cold water for concentrate. Adjust slightly based on your beans and grind size.
Do you need a special coffee maker for cold brew?
No special machine is required. A large jar, pitcher, or French press works as your brewing vessel. You will need a way to filter the grounds: paper filters, a fine mesh strainer, or a nut milk bag all work. Some dedicated cold brew makers include a built-in filter basket, but they follow the same immersion method. The key variables are grind size, ratio, and steep time, not equipment.
Why does my cold brew taste weak or bitter?
Weak cold brew usually means too coarse a grind, too short a steep, or too little coffee. Bitter cold brew often comes from over-extraction: steeping too long, using a grind that is too fine, or steeping at room temperature for too many hours. Try a slightly finer coarse grind, extend steeping to 16 hours, and taste every hour after 12. Small adjustments to grind and time fix most flavor issues.
Cold brew rewards patience and precision in equal measure, and the variables that matter most are the ones you control before the water ever touches the grounds. EmperRoar Coffee exists for exactly this kind of brewing: carefully selected whole bean and ground coffee, a premium range built for true coffee aficionados, and a lineup that makes finding your next favorite roast simple. Shop the collection at EmperRoar Coffee and start your next batch with beans worth steeping.